Mail on the internet is delivered through what is called an "SMTP server". Before you start using a mass email program like Email Marketer, you should decide who (or which server) will deliver your e-mail after you send it. We recommend using a dedicated SMTP server. Email Marketer has its own build-in SMTP server, but there are some cases where using any internal server on your machine to send directly will not work. If you do not know your "SMTP Server settings," which are the same settings you would need to set up your "Accounts..." under Outlook or Outlook Express, then you may want to go research that information from your system administrator or web service provider before you get started.
Please also note that your Internet Service Provider may have restrictions on how much email they wish to send for you. What's more, many ISP SMTP servers are badly overloaded. However, most web hosting providers, the people that host your website, also provide SMTP server facilities. Using your web host's SMTP server is almost always your best choice.
A mail account is necessary for sending mails both in Relay Mode mailing or Direct mode Mailing.
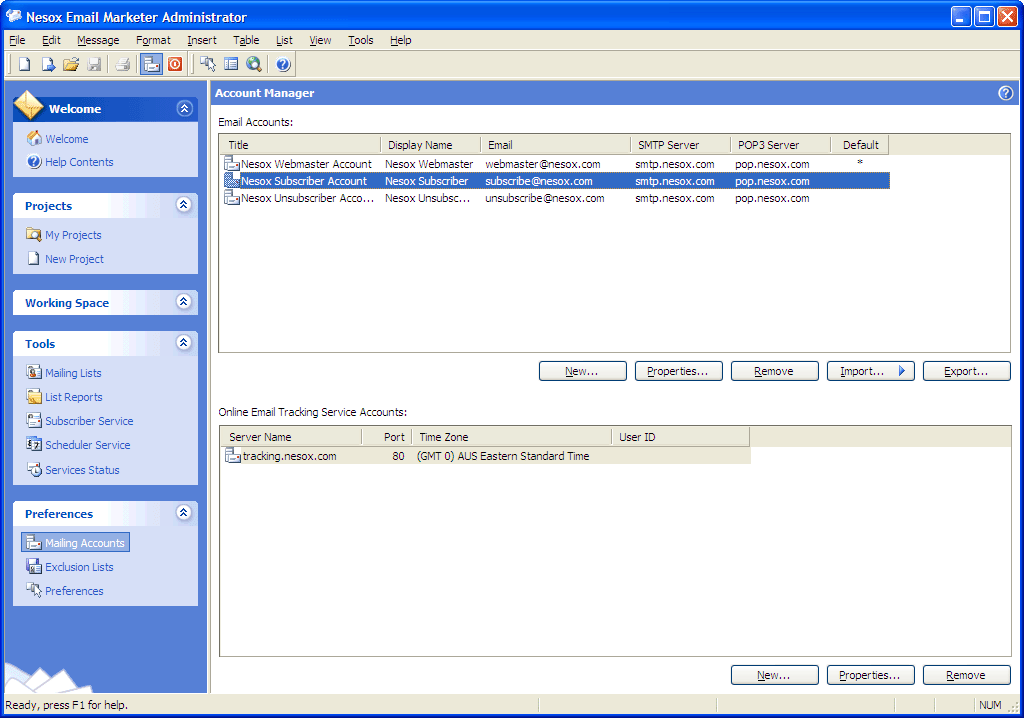
Email Marketer supports unlimited mail accounts and it imports your accounts from your operating system at the first launch.
To create or change your mail accounts, click Mailing Accounts on the lower left hand side of the screen.

New
Creates a new mail account.
Properties
Views or changes the settings of selected mail account. You may also double click
an account item to do this as well.
Remove
Removes the selected mail account. Note, projects may not work if the
account is referenced.
Import
Imports mail accounts from Outlook or Outlook Express.
Export
Exports mail accounts to Internet Account files.
To create an account, click the New button in the account list window:
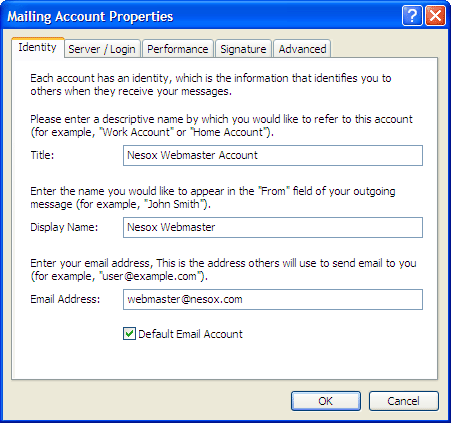
Title
This chooses the display name for the account. Recipients will not see this name so feel free to use whatever name suits you.
Display Name
This chooses the name for the email account. This name appears in the "From" field of the email and will be seen by recipients.
Email Address
The email address for the account which appears in the "From" field as well.
Default Email Account
Lets you choose which mail account will serve as your default mail account.
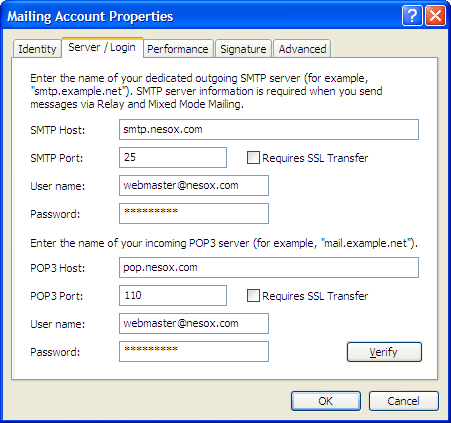
SMTP Host
SMTP server host for mail sending. Domain name or IP are both accepted.
SMTP Port
SMTP server port for mail sending. The default is 25.
POP3 Host
POP3 server host for mail receiving. Domain name or IP are both accepted.
POP3 Port
POP3 server port for mail receiving. The default is 110.
Requires SSL Transfer
Some SMTP or POP3 servers such as gmail.com support secured data transferring. Check if this is necessary.
User name / Password
If your server requires authentication, enter the information you normally use for logging into your email account.
Verify
This validates the account settings you wish to send from. It's strongly recommended that you verify the account before you click OK. You must be online in order to do this.
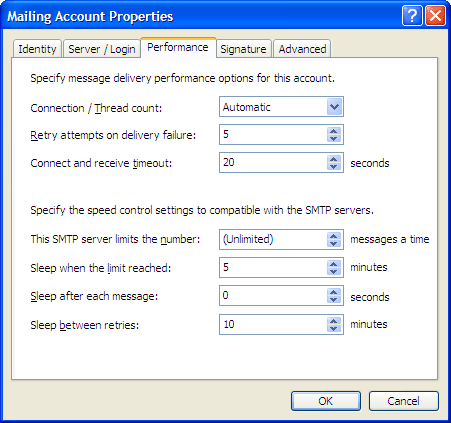
Connection / Thread count
Adjusts thread count for delivery, the default is Automatic.
Retry attempts on delivery failure
Retry count for resending each failed message delivery. The default is 5.
Connect and receive timeout
The maximum delay time to wait for the server reply after a request. If you have low bandwidth, 30 seconds timeout or more is required.
This SMTP server limits the number
The maximum number of mailings your ISP restricts.
Sleep when the limit reached
Sleep to fit the limits of your SMTP server.
Sleep after each message
Sleep between messages to control the load balance of mail servers, the default is 5 seconds.
Sleep between retries
Sleep between retries to control the load balance of mail servers, the default is 10 minutes.
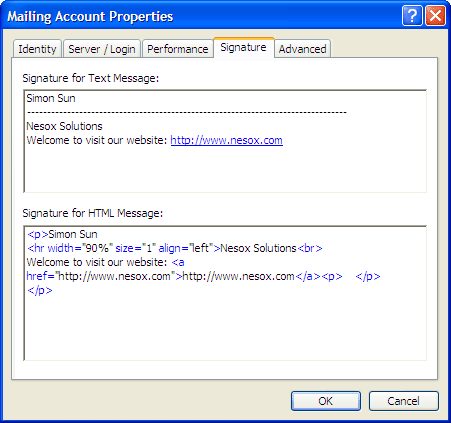
Signature for Text Message
Plain text signature for text based messages.
Signature for HTML Message
Rich signature for HTML based messages.
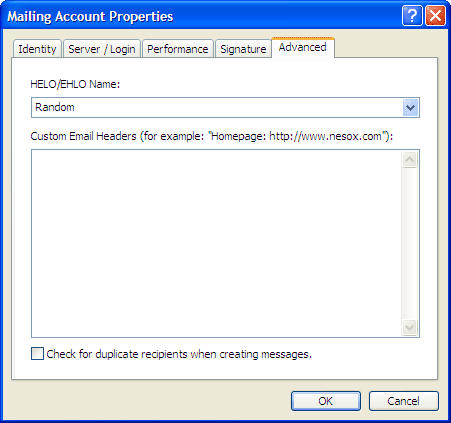
HELO/EHLO Name
The computer or domain name to talk with your or your clients' SMTP servers.
Custom Email Headers
Your own email header lines. For information about email headers, please reference
http://en.wikipedia.org/wiki/E-mail_header.
To remove an account, select the account and click the Remove button.
Note: projects may not work if the associated mailing account was removed.