Installation
If you are installing from the Internet
You may download the Nesox Link Checker software from the below link:
http://www.nesox.com/en/link_checker_downloads.asp
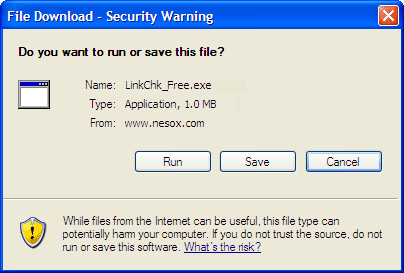
- To download Link Checker installation to your computer, simply click the
Save button and save the installation file to your computer.
Be sure to remember where you saved the file (the desktop might be a good place).
- Once the file has downloaded completely, please open the folder containing
the file you downloaded.
- Double-click the installation file LinkChk_Free.exe you just
downloaded to start installing Link Checker on your computer.
You may wish to visit our website
http://www.nesox.com to ensure
that you always have the latest version of Link Checker.
If you are installing from the CD-ROM
- Insert the CD into your CD-ROM drive.
- If the installation does not auto-start, double-click LinkChk_Free.exe
from the CD.
Installation Wizard
Please make sure you are log on to your computer either using administrator account
or your account has administrator right to install software. Follow these steps
to install Link Checker on your computer, you may cancel the installation at any
time by clicking Cancel. Please note if you are upgrading from the previous version of Link Checker, you do not have to uninstall your current installation.
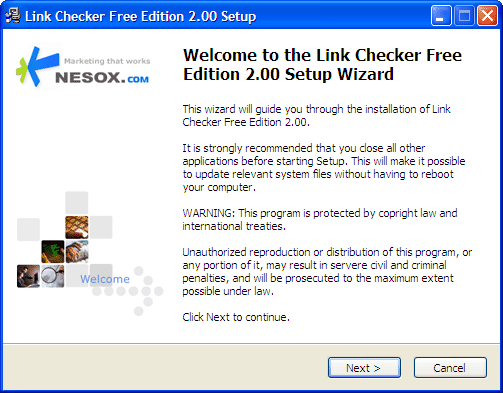
- You'll see this welcome screen. Click the Next button.
- The Wizard will display a licensing agreement. Read the entire agreement.
Use the scroll bar to move through the text. If you agree with the terms of
the EULA click I Agree.
- The Wizard will ask you the folder location where Link Checker will be installed
(By default, the location is C:\Program Files\Link Checker Free Edition\). If you need to
install Link Checker to a particular location, click the Browse button
and select the path of the Link Checker installation folder and click OK.
Otherwise, click Next. If you are upgrading from the previous version of Link Checker, please ensure the path is same as that of the previous version.
- Choose the program manager group of start menu. Default is fine. Click
Next.
- You will see a message window telling you that your installation is complete.
Click Finish.
- Link Checker is now installed. Click Start on the taskbar. On
the Start Menu, move your mouse pointer to Programs. On the
Programs menu, you will see the Link Checker Program Group icon. You may
click Link Checker to launch the application now.
During the installation process, you may be prompted with a warning about running
instance, close Link Checker if it is running
and then continue the installation.
* For Link Checker Free Edition, the installation package is LinkChk_Free.exe.
* For Link Checker Professional Edition, the installation package is LinkChk_Professional.exe.